I need all the inspiration I can get so I love to add uplifting quotes to the places I go a lot so that I am sure to see them again and again. I bought this vinyl saying and put it onto the glass of this thrift-store frame that I painted. I added the fabric behind it to give it some character.
Tuesday, March 11, 2014
Monday, January 27, 2014
Living Room Face Lift
 |
 |
| January is a really good time for changing things... |
 |
| And my living room was ready for a change. |
 |
| This IKEA map inspired me to add a touch of blue to the room. |
 |
| I lightened up the walls and removed the curtains to make it feel more fresh. |
 |
| It's still a work in progress....you can't change it all at once:) |
Thursday, December 12, 2013
our black and white "FamilyTree"
So my family is really into family history. We tell our kids stories about their great great grandparents and call them "ancestor stories". So I had the idea this year to include our heritage on our tree and call it a "family tree" We went back 5 generations from our kids on both sides.
 |
| I used a toile background for my side, |
 | ||||||||||
| ...and polka dot for my husband's side to distinguish between them. |
 |
| Here it is: our family tree |
 |
| kind of a switch from last year right? |
Keeping old favorites
Spray paint makeover!
Monday, November 18, 2013
Saturday, August 17, 2013
laundry room facelift
My sister-in-law wrapped fabric over pizza boxes to create this lovely
grouping on the wall of my niece's nursery. I decided to try it out myself....
My local pizza shop sold me the boxes for .35 cents each.
I used fabric scraps and sewed them together before
gluing the fabric to the box with a glue gun.
Afterward I drilled long screws into the my
wall and hung the boxes up in my mudroom.
Later I added a matching curtain to cover up some unsightly shelves.Finally I added a strip of the fabric to the top of the wall with liquid starch
(a trick I learned from my sister) to tie it all together:)
Thursday, January 31, 2013
quick barstool upholstery!
 |
| Want to give your kitchen a facelift? |
 |
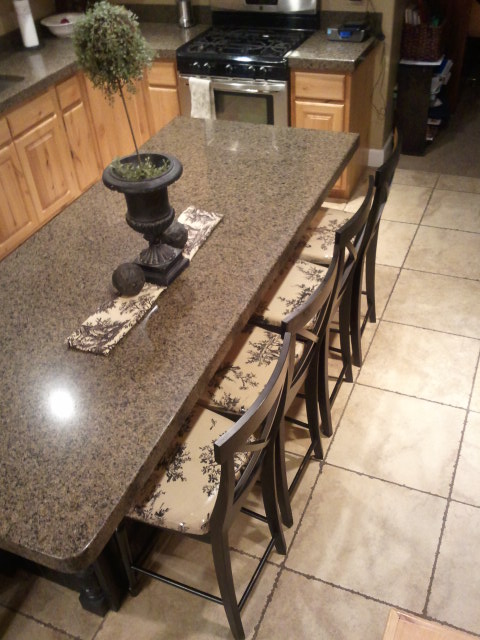
| I had 2-toned bar stools which I liked but didn't LOVE... |
 | ||||||||||||||||||||||||||||||||||||||||||||||||||||||||||||||||||||||||||||||||||||||||||||||||||||||||||||||||||||||||||||||||||||||||||||||||||||||||||||||||||||||||
| So I got this stuff: The foam is from Walmart (3.75 per seat), the vinyl was also from Walmart (about $1.00 per seat. I borrowed the staple gun (I really want to buy one for myself though!!!) and my sweet Mama bought me the fabric (you will need about 2 yards or more depending on how many seats you do). | , |
 |
| I started by cutting the fabric to generously overlap each seat. |
 |
| Then I decided to tea- stain the fabric to make it look a little more antique-looking. |
 | ||||
| Simply soak the fabric in black tea (which I don't drink, but use a lot for antiquing fabric!) |
 |
| After completely stapling the fabric tightly around the seat and foam, next add the vinyl. (I didn't glue my foam to the seat but I have seem it done like that...) |
 |
| finally, screw the seat back on the stool. |
 |
| much better! |
 |
| I don't even mind when the kids spill on it!!! |
 |
| Yeah! A kitchen makeover for about $5 per seat!!!!! (I didn't bother taking pictures of my living room which was a complete disaster when I got done...) |
Monday, July 2, 2012
Friday, January 20, 2012
Carseat Cover Tutorial
I cannot believe that I didn't publish one post all last year! It was not that I wasn't creating, but that I was too swamped to take time post anything. I have some old projects that I never added, this is one of them. It's a cover that goes over your car seat to keep your baby warm (and sleeping) as you tote her around. This one is a patchwork cover, but I have used solid fabric too. My squares are 7 inches. I did 5 squares for the width and 7 for the length. start by sewing the squares into rows, then sew the rows together. I have minkee, and flannel fabrics but cotton works great too.
Some of my squares are not perfectly lined up, but it doesn't really show unless you are looking closely at it!
I measured extra solid fabric to wrap around the front, this is an easy way to hem the cover and it looks cute to see the other fabric along the edge.
Next I made the straps. They can be rounded or square about 5-6 inches in length and 3-4 inches wide. Sew the 2 right sides together leaving room to fold it right-side out and then go over it again on the right side.
Sew the straps between 6-8 inches apart depending on your carrier (test it before you sew if possible!)

Some of my squares are not perfectly lined up, but it doesn't really show unless you are looking closely at it!
I measured extra solid fabric to wrap around the front, this is an easy way to hem the cover and it looks cute to see the other fabric along the edge.
Next I made the straps. They can be rounded or square about 5-6 inches in length and 3-4 inches wide. Sew the 2 right sides together leaving room to fold it right-side out and then go over it again on the right side.
I think it's cute to make the straps with 2 kinds of fabric.
If you have a snap setter, you can add snaps to the straps, otherwise you can put on buttons or Velcro.Sew the straps between 6-8 inches apart depending on your carrier (test it before you sew if possible!)
To embellish the straps you can add a large button or a flower etc.

I used embroidery floss...
...and sewed it on by hand.
All done!
When I gave this to my friend, I rolled it up and tied it with a matching ribbon.
I tied scraps of the fabric to the gift bag.
Subscribe to:
Comments (Atom)


